Using Events Service in Ionic 3 based App Development
There may be situations where your app needs to communicate across two or more components whenever some event or action happens within your application. Fortunately, Ionic 3 provides very effective way to handle such situations. We can use Events service within Ionic 3 app development. In this article, we will see how to use Events and do some action when an event is triggered.
I have choose Ionic starter app to demonstrate how event works.
We’ll create notification component using Ionic CLI:
ionic generate component notifications |
This will generate notifications component to your src/component directory.
You will need to import notification component in your app.component.ts
import {NotificationsComponent} from '../components/notifications/notifications'; |
Also add notification component entry to pages to make it available from the menu.
this.pages = [ { title: 'Hello Ionic', component: HelloIonicPage }, { title: 'My First List', component: ListPage }, {title:'Notifications',component:NotificationsComponent} ]; |
Let’s declare one variable in app.component.ts that stores notification count.
notification_count : number; |
Inside the constructor I am assigning some value.
this.notification_count = 0; |
Now we’ll also import notification component in app.module.ts
import {NotificationsComponent} from '../components/notifications/notifications'; |
Add it to declarations and in entryComponents.
Now, we would make some modification in app.html to show a notification count in the menu.
This page includes menu items.
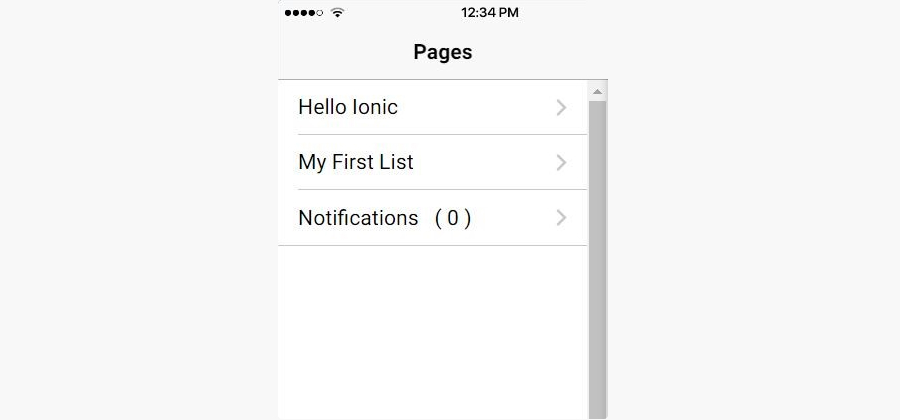
<ion-content> <ion-list> <button ion-item="" *ngfor="let p of pages" (click)="openPage(p)"> {{p.title}} <span *ngif="p.title=='Notifications'"> ( {{notification_count}} )</span> </button> </ion-list> </ion-content> |
As you can see, the code shows notification_count only when menu item title is “Notifications”.
Menu should now look as in the screen below.

Let’s have some content for our notification page. Copy below code and paste it to notifications.html
<ion-header> <ion-navbar> <button ion-button="" menutoggle=""> <ion-icon name="menu"></ion-icon> </button> <ion-title>Notifications</ion-title> </ion-navbar> </ion-header> <ion-content padding=""> <h3>Welcome to Ionic Events!</h3> <p>Current count = {{notification_count}}</p> <p> <button ion-button="" color="primary" (click)="publishEvent()">Add notification</button> </p> </ion-content> |
And below is the code we’ll use in notifications.ts
import { Component } from '@angular/core'; import { Events } from 'ionic-angular'; /** * Generated class for the NotificationsComponent component. * * See https://angular.io/api/core/Component for more info on Angular * Components. */ @Component({ selector: 'notifications', templateUrl: 'notifications.html' }) export class NotificationsComponent { notification_count: number; constructor(private events: Events) { this.notification_count = 0; } publishEvent(){ this.notification_count++; } } |
Publish an Event:
We have component developed that creates notification when user clicks on Add notification button.
You would see counter updates on notification page but what if we need to update the counter appears in the menu as well?
In order to achieve this we import events service from ionic-angular.
Now let’s hook our function up to the Events.publish() method.
First argument takes topic name and then any arguments we want to send across.
this.events.publish('notify',this.notification_count); |
Subscribing to an Event:
As our notification count of menu is in app.component.ts we can subscribe to ‘notify’ in that file.
Again import events as you have done in notification.ts. Now subscribe events with topic name that we sent from the notification page. Use below code in constructure and check the menu for notifications.
this.event.subscribe('notify',notify_count=>{ this.notification_count = notify_count; }); |
Conclusion:
Events allow you to communicate across multiple components by publishing an event and subscribe to that event within the component in which things need to be reflected.
Digital marketing is essential for all types of websites, whether it is an e-commerce site, a blogging site, a personal website etc. It is necessary...
 Sep 4, 2018

Comments
Leave a message...